How to Design a Whiteboard Schedule That Actually Keeps You Organized
While digital calendar apps offer convenience, many professionals and families find that a physical, highly visible schedule reduces cognitive load and keeps priorities front and center. A well-designed whiteboard schedule serves as a constant visual anchor, preventing tasks from slipping through the cracks of minimized browser tabs and muted notifications.
However, setting up a board that is both functional and aesthetically pleasing requires more than just drawing lines with a dry-erase marker. Without the right materials and layout strategies, whiteboards quickly become cluttered, stained, and ignored. This article explores practical whiteboard schedule ideas, advanced graphic facilitation techniques, and DIY grid tutorials to help you build a planning system tailored to your specific workflow.
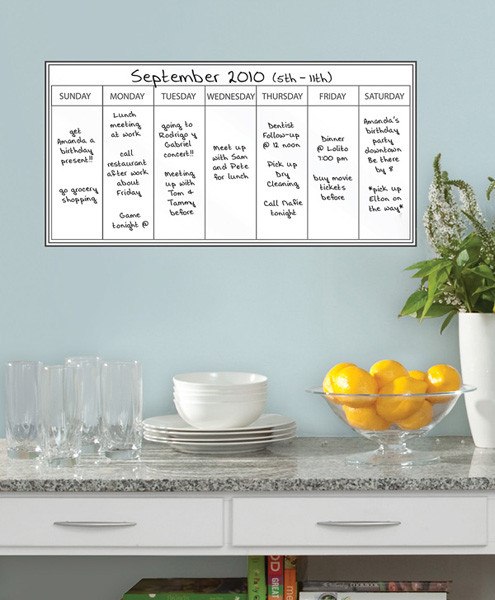
Image source: Window Film World
Which Whiteboard Layout Fits Your Current Workflow?
The foundation of any effective visual planning system is choosing a layout that matches the cadence of your life. According to graphic facilitation experts like Yuri Malishenko, physical boards act as "thinking tools" rather than mere display surfaces. The act of physically writing and moving items helps encode information into memory, reducing the mental fatigue associated with digital-only planning.
Daily Focus Layouts
For individuals in high-intensity roles with rapidly shifting priorities, a daily focus layout is highly recommended. Rather than mapping out an entire month, this layout divides the board into hourly time blocks alongside a strict "Top 3" priority list. By limiting the visible timeframe to a single day, users can maintain heads-down focus on immediate tasks without the anxiety of looking at next week's deadlines. This approach is particularly useful for project managers and freelance creatives.
Weekly Structure Layouts
The weekly layout is widely regarded as the sweet spot for most users. As noted by productivity resources like Boardmix, a weekly view prevents over-commitment by clearly displaying your total capacity for the next seven days. A standard weekly board typically features vertical columns for each day, allowing you to see how meetings, deep work sessions, and personal errands stack up against one another.
Monthly and Annual Overviews
If your primary goal is tracking high-level milestones, fiscal deadlines, or family travel, a monthly or annual layout is an excellent choice. These boards require less daily maintenance and serve as a macro-level roadmap. Creative Safety Supply highlights that annual boards are particularly effective in corporate environments for tracking quarterly goals and long-term project phases.
Before buying materials, determine your style:
- The Minimalist: Needs plenty of white space. Best suited for a simple weekly Kanban board.
- The Color-Coder: Thrives on visual categorization. Best suited for a highly structured weekly grid with assigned marker colors.
- The High-Detailer: Needs to see everything at once. Best suited for a dual-board setup (one monthly overview, one daily focus).
How to Build a Permanent DIY Grid That Looks Professional
Drawing grid lines with a standard dry-erase marker is a common mistake. The lines will inevitably smudge when you erase your tasks, forcing you to redraw the calendar constantly. To create a professional-looking schedule, you need to build a permanent grid using tape or vinyl. Here is a reliable method for achieving clean, straight lines.
Standard whiteboard erasers leave behind a microscopic layer of ink dust and oils. Before applying any adhesive, you must deep clean the board. According to Domestically Creative, wiping the surface with isopropyl alcohol ensures that tape or vinyl will adhere smoothly without peeling at the corners.
When working with a standard 2'x3' board, drawing straight lines with a physical ruler often results in "line drift"—where the grid slowly slants downward. Projecting a laser level across the board provides a perfect, hands-free guide for laying down your tape, ensuring a flawless geometric grid.
To ensure your grid boxes are perfectly sized for standard tasks, use a 3x3 inch sticky note as a physical spacer. Place the sticky note on the board, lay your tape directly against its edge, move the note, and repeat. This guarantees that every cell on your calendar will perfectly fit a standard post-it note.
Choose your grid material carefully. Washi tape offers flexibility and comes in various colors, but it may peel over time in humid environments. Pinstripe tape (often used for automotive detailing) provides high-contrast, durable lines. If you prefer a seamless look, using a vinyl cutter to apply Oracal 651 (permanent) or Oracal 631 (removable) vinyl yields a highly professional finish.
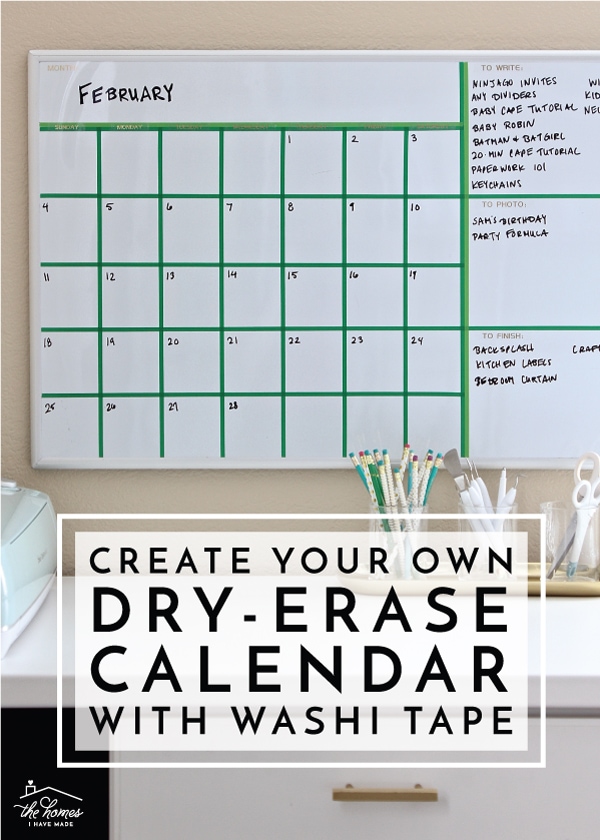
Image source: The Homes I Have Made
Advanced Graphic Facilitation Tips for a Cleaner Board
Once your grid is established, the way you write on the board determines how readable and clean it remains. Incorporating techniques from professional graphic facilitators can elevate your board from a messy list to a clear communication tool.
The 3-Second Rule for Ghosting
One of the most frustrating aspects of using a whiteboard is "ghosting"—the faint, smeared ink left behind after erasing. This often happens because users erase the ink while it is still wet. Dry-erase markers consist of color pigments suspended in a fast-drying solvent. If you wipe the board immediately after writing, you smear the solvent across the surface. By waiting just three seconds for the solvent to fully evaporate, the pigment turns into a dry powder that wipes away cleanly.
The Dotted Line Hack
When mapping out tentative plans or weak relationships between tasks, dotted lines are incredibly useful. However, drawing individual dots is tedious and often looks sloppy. A highly effective technique is to draw a solid, straight line, let it dry for a few seconds, and then use your fingertip to "tap out" evenly spaced sections. This creates a perfectly uniform dotted line in a fraction of the time.
Parallel Shading Techniques
If you want to highlight a specific day or task, your instinct might be to color in the entire grid box with a marker. This usually results in a muddy, streaky mess that ruins the tip of your marker. Instead, use "parallel shading." Draw a thick colored line precisely next to the black text or along the inside border of the grid box. This provides visual emphasis and color-coding without the messy appearance of solid filling.
Why You Should Use the Fluid Layer Sticky Note Strategy
Writing directly on the whiteboard is fine for static information, but schedules are inherently dynamic. Meetings get pushed, tasks take longer than expected, and priorities shift. This is where the "Fluid Layer" strategy proves its value.
The Permanent vs. Fluid Concept
In this workflow, the whiteboard surface and the taped grid represent the permanent layer. The tasks themselves are written on small sticky notes, which represent the fluid layer. If a Tuesday task needs to be moved to Thursday, you simply pick up the note and move it. This eliminates the constant erasing and rewriting that degrades the board's surface over time.
Color-Coding by Category
Sticky notes allow for effortless color-coding. You might assign yellow notes to client work, pink notes to administrative tasks, and blue notes to personal appointments. A quick glance at the board immediately reveals your balance of responsibilities for the week. If your Wednesday column is entirely yellow, you know instantly that it is a heavy client-facing day.
The Sandwich Method for Glass Boards
For users who prefer glass desktop boards, Reddit productivity communities frequently recommend the "Sandwich Method." Instead of taping a grid onto the glass, you print a beautifully designed schedule template on standard paper and place it behind the glass pane. You can then write on the glass surface with dry-erase markers. The template remains perfectly protected, and you can swap out the paper design whenever your workflow changes.
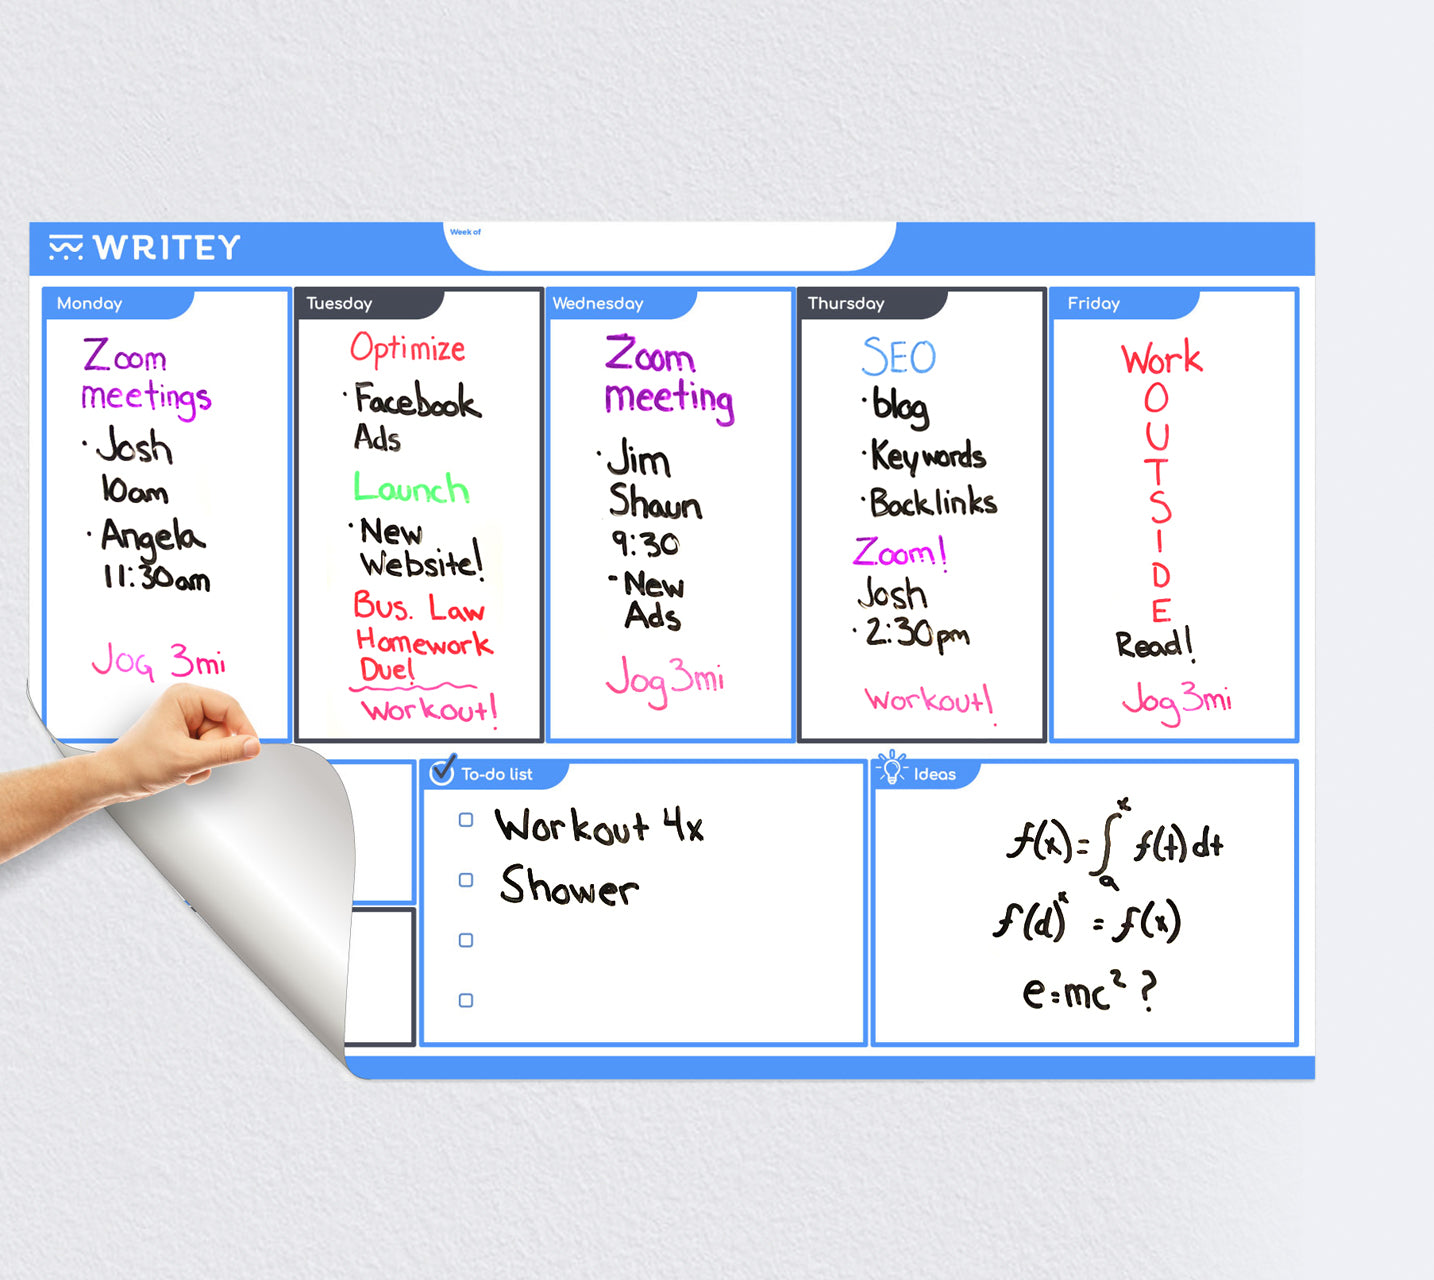
Image source: Writey Board
Creative Whiteboard Schedule Ideas for Remote Workers
Working from home blends personal and professional boundaries, making visual organization even more critical. A dedicated home office whiteboard can serve as a physical boundary that helps you transition into "work mode."
The Kanban Whiteboard
For project-based remote workers, a Kanban layout is a top-tier option. Divide your board into three simple vertical columns: "To Do," "Doing," and "Done." Write your weekly deliverables on sticky notes and physically move them across the board as you progress. The tactile satisfaction of moving a note into the "Done" column provides a psychological boost that digital task managers struggle to replicate.
Time-Blocking Layouts
If your day is dominated by Zoom calls, a time-blocking layout is highly effective. Create a vertical timeline down the left side of the board (e.g., 8:00 AM to 5:00 PM). Block out your non-negotiable meetings first using red marker. Then, identify the empty gaps and assign specific "deep work" tasks to those blocks using green marker. This visualizes exactly how much actual working time you have between meetings.
Syncing Digital to Physical
A common workflow for remote professionals is the Monday morning sync. Spend 15 minutes reviewing your digital calendar (Outlook, Google Calendar) and transfer only the most critical, heads-down priorities to your physical whiteboard. The digital calendar manages the noise and the meeting links, while the physical board dictates your actual focus for the day.
How to Organize a High-Traffic Family Command Center
Managing a household requires coordinating multiple schedules, meal plans, and chores. A family command center whiteboard acts as the central source of truth for the entire home.
The Multi-Kid Tracking System
Instead of a traditional calendar, many families use a matrix layout. The days of the week run down the left side, and each family member gets a dedicated vertical column across the top. This makes it easy to see that on Tuesday, one child has soccer practice while another has a piano lesson, preventing scheduling conflicts.
Meal Planning Integration
Decision fatigue around dinner is a common pain point. Dedicate the bottom corner of your family whiteboard to a "What's for Dinner?" section. By mapping out meals for the week on Sunday, you streamline grocery shopping and eliminate the daily stress of deciding what to cook.
Chore Charts and Habit Trackers
Incorporate a section for daily responsibilities. Using magnetic icons or simple checkboxes, kids can mark off when they have completed their homework, fed the pets, or packed their backpacks. Making these responsibilities visible to the whole family encourages accountability.
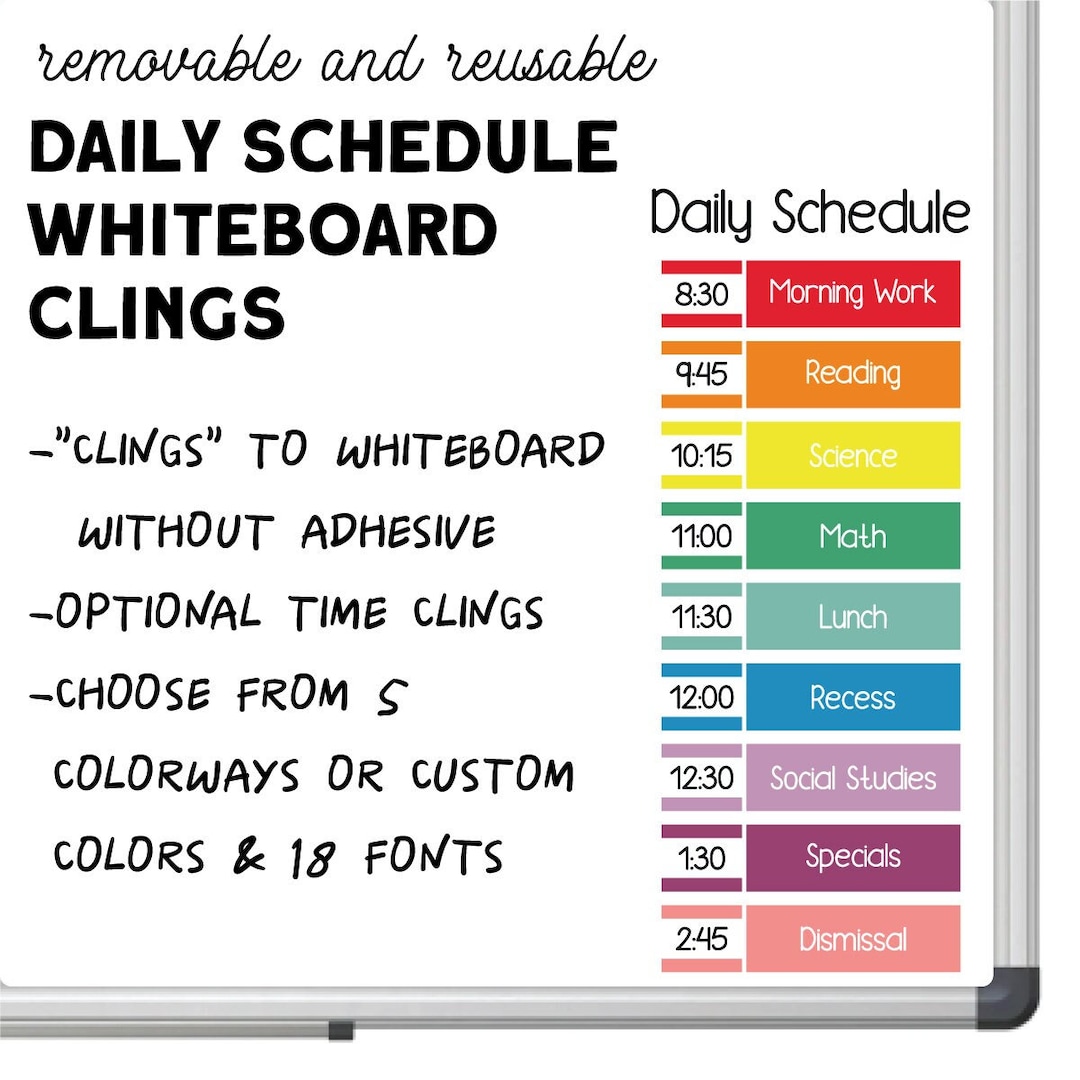
Image source: Etsy
Classroom Scheduling Ideas That Save Teachers Time
For educators, the daily schedule board is a vital classroom management tool. It provides students with predictability, which reduces anxiety and minimizes repetitive questions about what is happening next.
Subject-Based Color Coding
Assigning specific colors to different subjects helps younger students visually process the day. For example, all math-related activities might be written in blue, while reading blocks are in green. Over time, students learn to associate the colors with the required materials, smoothing out transition periods between lessons.
The "Where Are We?" Indicator
Instead of rewriting the schedule every day, create a permanent vertical list of the day's standard flow. Then, use a brightly colored magnetic arrow or a distinctive magnet to indicate the current activity. As the day progresses, simply slide the magnet down the list. This provides a clear visual anchor for students returning from the restroom or special pull-out sessions.
Smudge-Proofing the Board
Classroom whiteboards are magnets for curious hands. To prevent students from accidentally erasing the schedule, place the daily agenda high up on the board, out of reach. Alternatively, use wet-erase markers (like Expo Vis-à-Vis) for the schedule framework. Wet-erase ink will not smudge if a student brushes against it; it only comes off with a damp cloth.
How to Stop Your Whiteboard from Ghosting and Staining
Even the most beautifully designed schedule will become an eyesore if the board itself degrades. Understanding material science and proper maintenance is crucial for keeping your planning system pristine.
Most budget-friendly whiteboards are made of melamine (a plastic coating over pressboard). While affordable, melamine is highly porous. Over time, marker solvents eat away at the clear coating, allowing pigment to sink into the pores. This causes permanent ghosting. Melamine boards are suitable for light, occasional use but will degrade quickly under the demands of a daily schedule.
For heavy daily use, magnetic painted steel or tempered glass boards are widely considered superior options. Steel boards are non-porous and resist ghosting significantly better than melamine, while also allowing the use of magnetic planning accessories. Glass boards are completely non-porous, meaning they will never stain or ghost, though they require stronger neodymium magnets if you wish to attach notes.
The Deep Clean Protocol
If your board is already showing signs of staining, a deep clean can often restore it. Avoid abrasive cleaners like scouring pads, which will permanently scratch the surface. Instead, use a high-concentration isopropyl alcohol (90% or higher). The alcohol breaks down the stubborn polymer binders in old dry-erase ink. For a natural alternative, a mixture of white vinegar and water can also lift mild stains.
Troubleshooting Permanent Marker Mistakes
If someone accidentally writes on your schedule board with a permanent marker, do not panic. Simply take a fresh, high-quality dry-erase marker and color completely over the permanent ink. The solvent in the dry-erase marker will reactivate the dried permanent ink. Wait three seconds, then wipe the area clean with a microfiber cloth or eraser.
Frequently Asked Questions
The Bottom Line on Effective Whiteboard Planning
A well-executed whiteboard schedule transforms a blank wall into a powerful productivity engine. By combining the right materials with smart layout strategies, you can create a system that keeps you organized without requiring constant maintenance.
- Choose the right surface: Opt for magnetic steel or glass over melamine for long-term durability and stain resistance.
- Build a permanent grid: Use a laser level and pinstripe tape to create clean, straight lines that won't erase.
- Adopt the Fluid Layer: Use the board for your static grid and sticky notes for dynamic tasks that move throughout the week.
- Master the 3-Second Rule: Wait for marker solvent to evaporate before erasing to prevent messy ghosting.
- Color-code with purpose: Assign specific colors to categories or family members to make the board readable at a glance.